Monday 8 August 2016

Framing

Due to me being so behind with the blog, I can't really remember much of the detail up to framing stage - I have trouble remembering anything anyway so the only thing I do recall was noticing how quickly the frame went up after slab pour and getting two invoices in the mail requesting the first two stages payments!!

I'll just post the photo's of the framing stage including a view of the house from the lovely park directly opposite. 


Site Start

I've been a little slack with updating the blog but thought I should give an update to let you know where we are at currently, so bear with me as I attempt to remember the past 5 months!!

We had our official site start on Monday 21st March 2016 and the concrete pour happened on 16th April.


I very quickly want to share that there are some coincidences around our home and in particular our address that holds special significance to me. I can't give specifics without announcing our whole address but will share what I can.

I was very close to my grandparents growing up until a few years ago when they passed away. When we purchased this block of land I quickly realised that the street name matched that of my grandmother's childhood circus she grew up in (I, being the believer that I am thought this was a sign that this block was meant to be).

As we drew up the paperwork and we were about to sign the contracts, rather than see the Lot No, we were given our new street number - which is obviously a normal thing to find out at some point. It was then that we found out our new street number was my grandfathers' special number - the number of the house he grew up in, the number of his football jumper and generally the number he used for everything - it was his lucky number.

I am sharing this because as I have written that the concrete pour happened on the 16th April, this date was also my daughter's 2nd birthday. Whether its just me finding the significance in all of these things combined or it really is just a freaky coincidence, I really feel like this was meant to be our family home.

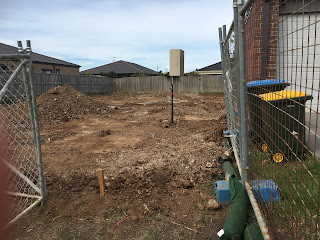
Anyway, back to what the blog is really about - house build updates. Some photo's of the concrete - I must admit I find these early photo's particularly boring, I mean it really is just a patch of dirt with some concrete on top but for those wanting to follow along here they are;


Our independent inspector did find a few things that needed to be rectified and I must admit our SS has been really good about getting things fixed up asap without any complaints. I wont go into details about the report here but if anyone does want to get more of an idea let me know and I can tell you more. 


Sunday 28 February 2016

Dispensation Hell

Continuing on from where I last left off, we were scheduled to have our Tender appointment on 20th October 2015, as this clashed with a prior scheduled day surgery for my partner we had to change the date. Our BC at the time didn't make this easy and and as this meant moving our Tender and Contract appointment into November it would therefore affect our site start in December. We were threatened kindly reminded that this site start was the basis of a credit voucher to be used towards any extras we added at our WOS appointments. A few phone calls and emails later to her supervisor and our appointments were changed to a more suitable time (a week later) as well as the promise that our voucher would still be honoured.

Tender was held on 26th October 2015 and proved to be fairly expensive; site costs that were initially quoted around the $16k at sales had since become around $25k plus an additional $6k ish for dwarf walls, glazing to windows and one dispensation.

We arrived at Contract signing on 19th November 2015 after taking an hour and a half in traffic and then struggling to find the new office in Docklands where we were introduced to another BC who advised that our original BC had been MIA and they weren't aware but assuming she wasn't returning to the Company. At this point she had left work about two weeks prior and no-one could contact her (that definitely explained the non returned phone calls and emails etc).
On top of this our costs had increased again, contract signing was not going well. Our site costs were now around $28k plus the additional $6k for privacy requirements. Then an additional $5.5k for upgraded double glazing to most of our windows. It was at this time that we were advised that we had to apply for 3 dispensations in total, one for the garage roof height, one for garage wall height and a third for our main bedroom terrace overlooking a back neighbour.

Which brings us to here, today, almost 8 months post sales (and 3.5 months post contract) with the news we've been waiting for.......dispensations have been approved and permits should be issued by the end of the week.!!!

It hasn't been an easy time, we've had 3 neighbours unhappy at us building a double storey, the most hostile one had written to the Council which caused them to decline one dispensation (garage roof height) initially however, after the builder confirmed they could excavate further it appears that everything else is fine. I want to wait until we have the permits in hand rather than an email advising they're being issued however I cant help but happy dance, for a while I didn't think that building our home was actually going to eventuate.

I'm hoping that we can get a start date fairly soon and I will then be able to update a bit more regularly with how the build is going and passing on some (hopefully) helpful information to anyone reading/following our progress.


Thursday 24 September 2015

The guts of it

In my previous post I covered our external colours as well as upgrades and pricing where relevant, which now brings me to internal colour selections.

Structural Upgrades:
I did make some structural changes such as adding a Galley and adding a door to gain entry to under the stairs. We decided to do this from the Pantry rather than through the wall along the stairway. I wanted a full wall along there so originally there was a Linen cupboard however I had this removed. It does mean that we lost some shelving in the Pantry however for me I felt it suited us better.
The cost to add the Galley was $712 which would normally only include open shelving and no cupboard space nor sink. It worked out well for us though because the Promo meant that we would get a full fit out including underbench cupboards, sink and Caesarstone benchtop.
I also decided that rather than have yet another Linen near the Powder room downstairs I would have the doors removed and leave the bottom two shelves so that we could essentially turn this into a hall cloak area, where the kids could leave school bags as well as jackets and shoes.


Internal Upgrades and Colours:
The interior wall colour is Southwards (shown below) and architraves/doors  will be gloss white.

As much as we would've loved to upgrade the interior doors I couldn't justify the cost for the ones I wanted and decided that this was something easy enough (and cheaper) to do post handover. I figured that I would put my budget into our 'non-negotiables' so we are going with regular, white standard doors and standard polished door handles throughout.


The staircase we opted for is an upgrade, noted down as the Traditional Option 5. It's the same as in the Waldorf Grange. We are currently able to get Category 2 Option 2 as part of the 'Dare to Dream' Promo but have just found out that the cost for the upgrade is $7180. I'm hoping at Tender we will see a credit for the Cat 2 option otherwise this will have to be removed will be an expensive staircase that I'll be glad I upgraded too.

We have decided to add 3 stair lights (I will do a separate post covering Electrical with pricing) because if you're spending that much on a staircase then you should show it off day and night right? Not to mention the safety benefits if someone wants to go down for a midnight snack.

Flooring:
With our flooring we have chosen Spotted Gum, which we have requested to be laid throughout the lower floor (with the exception of wet areas of course) and skip carpet, which is normally in the formal lounge and theatre rooms. Our thinking was that I wouldn't be so concerned if guests walked in with shoes on and if the kids accidentally had spills while watching a movie in the theatre room (which they commonly do) then it's not a big deal to clean up. This was included as part of Promo so no extra upgrade costs here.


For our carpet we already were upgraded to Cat 2 carpet and underlay with the Promo but decided to upgrade to Cat 3 for both. Carpet colour we've gone for is Komal (a dark grey), which will be entirely upstairs (again except wet areas). We've been told to expect additional costs of around $3500 for the upgrade but again have to wait to Tender for confirmation.  Unfortunately I don't have a sample of the colour.
Floor tiling selections will be covered a bit later with other tile selections.

Kitchen:
The kitchen was the main area we wanted to focus our budget on, as in cabinetry and I was pretty adamant that I wanted the kitchen as displayed in the Waldorf (which is also the same one displayed at WOS) Pictured below.


The Promo gave us the following upgrades (in addition to many others but these are what really saved us some money;
* 40mm stone to Island with waterfall edge
·         * Extension to overhang (1080mm width)
·         * Silk finish to kitchen, galley and pantry cabinet doors

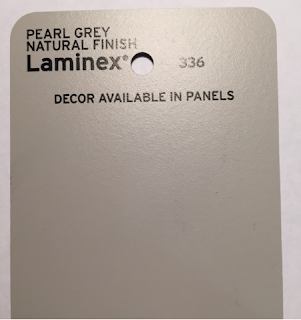
To provide Colourtech finish to cabinets in Satin Finish and Colonial Profile, we paid $3242 for the Kitchen, $1475 for the Galley, Powder Room $757 and Master Ensuite $1716. We also paid $352 for the overhead cupboards to be fitted with a light shelf for downlights and $645 for two overhead cupboards to be fitted with Glazed Doors (one at each end). All doors will be in Pearl Grey colour and Stone benches will be Crystal Chalk, a standard colour.


Tiling:
Splashback, Galley, Master Ensuite and Powder Room will all be in the Masia Blanco 75mm x 150mm (same as WOS, pictured above and laid in brick pattern, again as above). Cost of upgrade $810


Master Shower will be the same tile in longer version, measuring 75mm x 300mm and costing $1600 to upgrade.
With the remaining ensuites we chose a standard tile of the same measurements in Gloss White color (the above picture shows the upgraded tile on top and standard on bottom) to match. Shorter version for vanity's and longer for showers.
Floor tiling chosen for all wet areas flooring and around the spa is called Himalaya Grey 600mm x600mm and I'm totally in love with it. It looks like a concrete colour, which I understand may not be to everyone's taste but I can't wait to see them laid. This tile was also an upgrade and cost $2800.


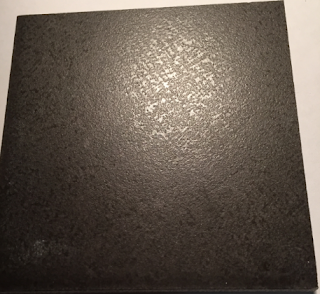
Outdoor Tiles  for the Terrace and Balcony are the Como Black External 450mm x 450mm and cost $170. I'm still a little unsure of the Black tiles for the external areas however the Tile consultant convinced me that it was a smart decision to match the external tiles with the carpet colour so that it looks continuous and I can understand the rationale behind it, it's just the darker colours are quite different to my usual taste.


Other Items:
Other upgrades internally that did cost extra were the Posh Bristol Shower Rail, at $41 each we added to each ensuite and to the Master Ensuite in addition to the Shower Ceiling Dumper we got as part of the Promo. We also added Niches, ensuites 2,3,4 cost $160 each and Master $194.

We are scheduled for Tender around the 20th October so there won't be much activity on the blog until then, where hopefully I will be able to confirm pricing of upgrades etc. and post Electrical plans.


Friday 18 September 2015

External Selections


To me, Lisa, I find it one of the more exciting times of the build - to do your Colour Selections. It can also be tricky working out what upgrades you want to make and balancing that with your budget as well as ensuring you don't forget about the important structural changes you might want. So far, we feel comfortable with the choices we've made, fingers crossed we still feel this way at handover.
As mentioned in my previous post, we really loved the feel of the Waldorf Grange and decided that we would follow the same colour scheme for our build. The above picture was taken from the Porter Davis website and shows the Long Island Facade, which we are also upgrading too at a price tag of $12,500.

So external colours we chose were;
·         Render - Ashite 1/2 strength (Sample is full strength)


·         Portico Posts, Meter Box, Balcony, External Doors, External Architraves - Grey Pebble 1/4 strength (Sample is full strength)


·         Cladding - Grey Pebble 3/4 strength

·         Garage Door & Downpipes - Shale Grey


·         Windows - Pearl White Gloss


·         Fascia & Gutter - Colourbond Basalt


We were initially advised that the upgrade to the Long Island Facade didn't include Render to the front however, we have signed up with the 'Dare to Dream Promo' which states we get render to the front facade included so I am in the process of clarifying this with our BC otherwise we are looking at a further $5000 to upgrade.

In terms of Bricks, we have gone with Standard Homestead Buff but depending on the response to the facade render we may decide to upgrade to Hebel if it's more cost effective.

Roof Tiles have been upgraded to Cat 3 Traditional with Colour being Barramundi, a dark grey (almost black). Upgrade costs are listed as $2672 which will be confirmed at Tender.

As part of our promo package we received the two doors we liked included however had to pay $500 to upgrade the balcony door to match.

Doors will be painted Grey Pebble 1/4 strength (Apologies for the picture quality, this was the best I could get)


This is all the external options covered - I will update the blog soon (ish) with internal options and prices.

Tuesday 15 September 2015

What have we done????

I sometimes wake up in the middle of the night in a cold sweat asking myself this exact question!

In 2012 we built the Randwick with Porter Davis in Point Cook, fast forward a short 2.5 years, with an extra baby and school zoning issues, we needed to move so here we are, going through the fun, stressful, exciting times that building a home can bring.

We decided pretty early on that we would build the Waldorf as we didn't want to feel as though we'd outgrown our house, with an expanding family but limited land width our only Waldorf option was the 43sq - which we are extremely happy with.

We recently sold our first home and applied for the finance for the land and construction together rather than settling on the land and worrying about the build later. Doing it this way certainly saved us a lot of the stress we found ourselves in with valuation issues the first time around and I would definately recommend to anyone building to apply this way. First lesson learnt!

We have settlement on the land scheduled for Sept 28th, 2015 with site start booked in for December, 2015.

Last week we completed our World of Style appointments and after falling in love with the Waldorf Grange out at Greenvale, we have decided to follow along with the same colour scheme. I will post our colour selections and prices for anyone that may be interested in a separate post.